A gang sheet is a single DTF transfer sheet packed with multiple designs instead of just one — yours, all laid out side by side on the same printed sheet. It's the most cost-effective way to buy DTF transfers, because you only pay for the sheet itself rather than for each individual design. You can mix different designs, different sizes, and different quantities on the same sheet, then cut them apart after we print them.
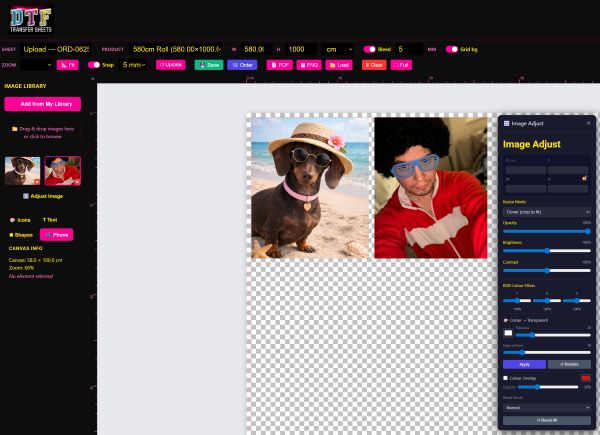
Our Gang Sheet Builder is the browser-based tool that lets you lay all this out yourself, before you order. You pick a sheet length, upload your artwork (or build something from scratch using our built-in icons, text, and shape tools), and drag everything into position on a canvas that's the exact size of the real sheet. What you see on screen is what gets printed — real-scale rulers, real-world dimensions, no guesswork. There's a Fill Canvas tool for single-design runs, background removal for tidying up artwork, and you can save your work to your account and come back to it later.
When you're happy with the layout, you click Order and it goes straight into our production queue. Our team downloads the file exactly as you've designed it, loads the roll, and prints it. No back-and-forth by email, no proofs to approve, no surprises — the sheet you designed is the sheet you receive.